Bracket Builder

>traynrex RED<
Getting Started
Introduction

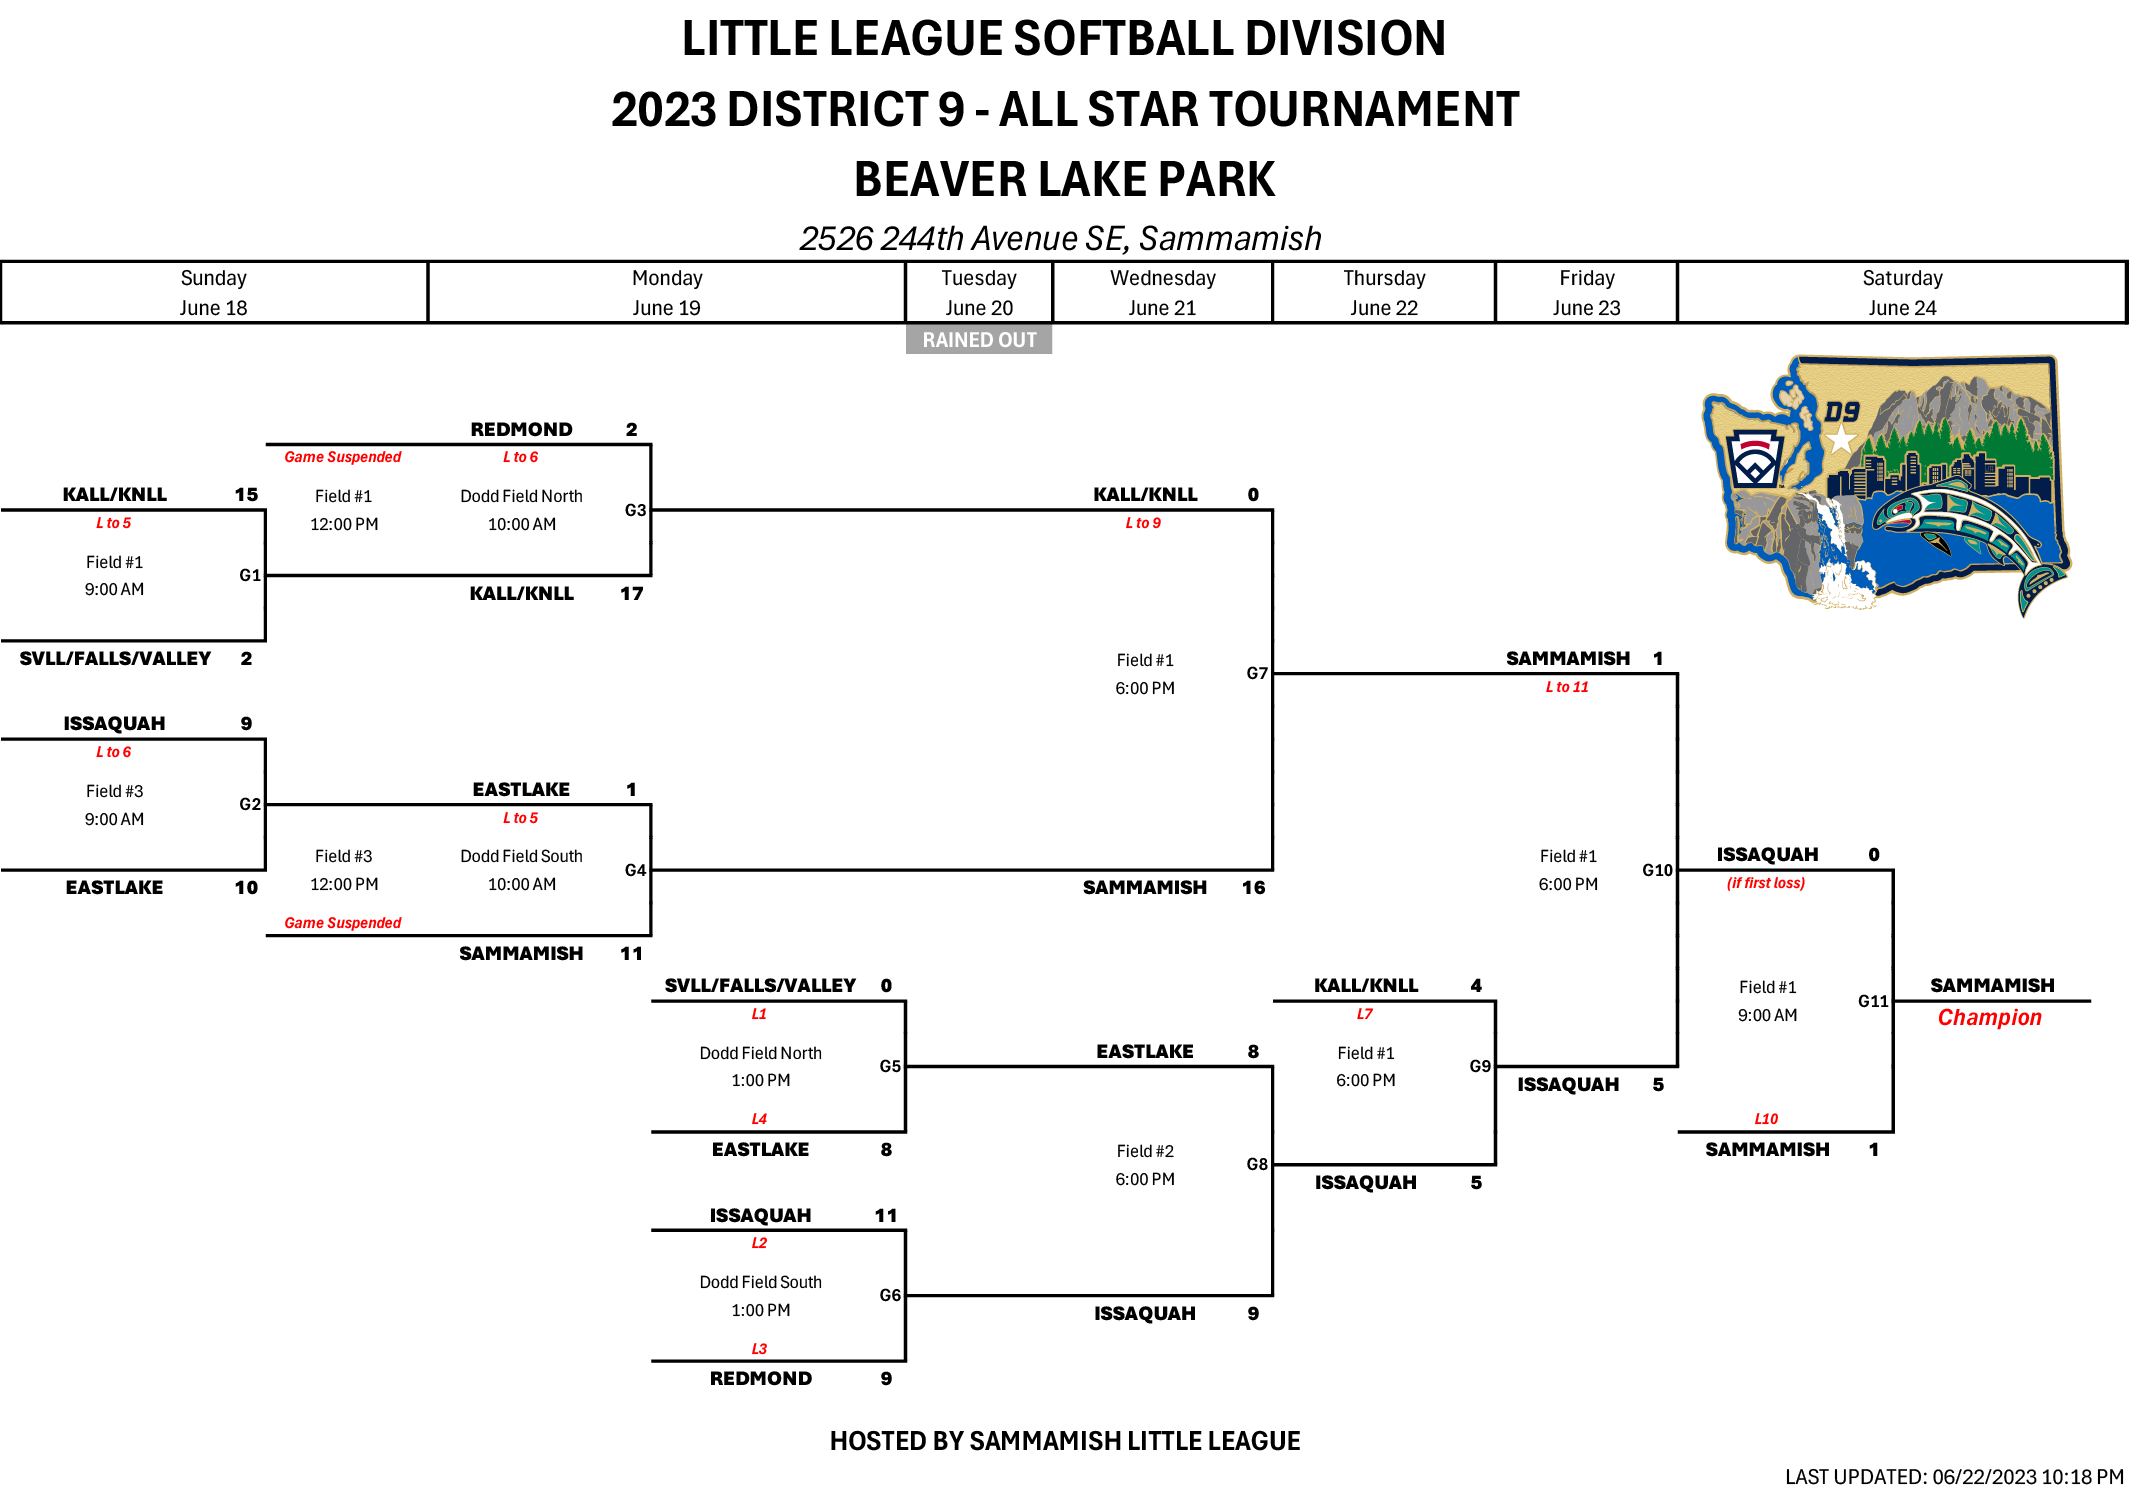
Making tournament brackets like this one can be tedious -- you have to figure out which games have to play on which days, and you get bogged down in making sure the formatting works and that you don't cross the lines. It doesn't help that the recommended double-elimination brackets for Little League can be a little hard to follow.

Bracket Builder addresses all of these problems. Every game in the bracket conforms to the double-elimination bracket, and every time you add a game, it will format the cells to connect the games. It will even adjust your entire bracket to avoid the most common bracket building headaches, namely things like reordering games to make games fit without crossing lines.

When your bracket is built and you have applied the finishing touches, you can add scores to the bracket and the team names will automatically fill in as you progress through the bracket. This is very helpful if you want to export the bracket to a PDF and post it to the web to keep everyone up to date.

Go through these help topics to first get started with your first bracket, and then dive into the advanced topics to learn how to tweak your bracket without breaking things.

Compatibility

First, a note able these brackets and their compatibility. This add-in creates double-elimination tournament brackets that conform to Little League's Approved Double Elimination Tournament Brackets. If you intend to use these for a Little League tournament, remember they must still be approved in order to be used in the Little League tournament. This add-in just helps you create and format the bracket.

Quick Walk-Through

Ok, there's a lot of details we could go into, but let's just do a quick walk-through to get you used to it.

  • Create a new workbook and insert the Add-In.
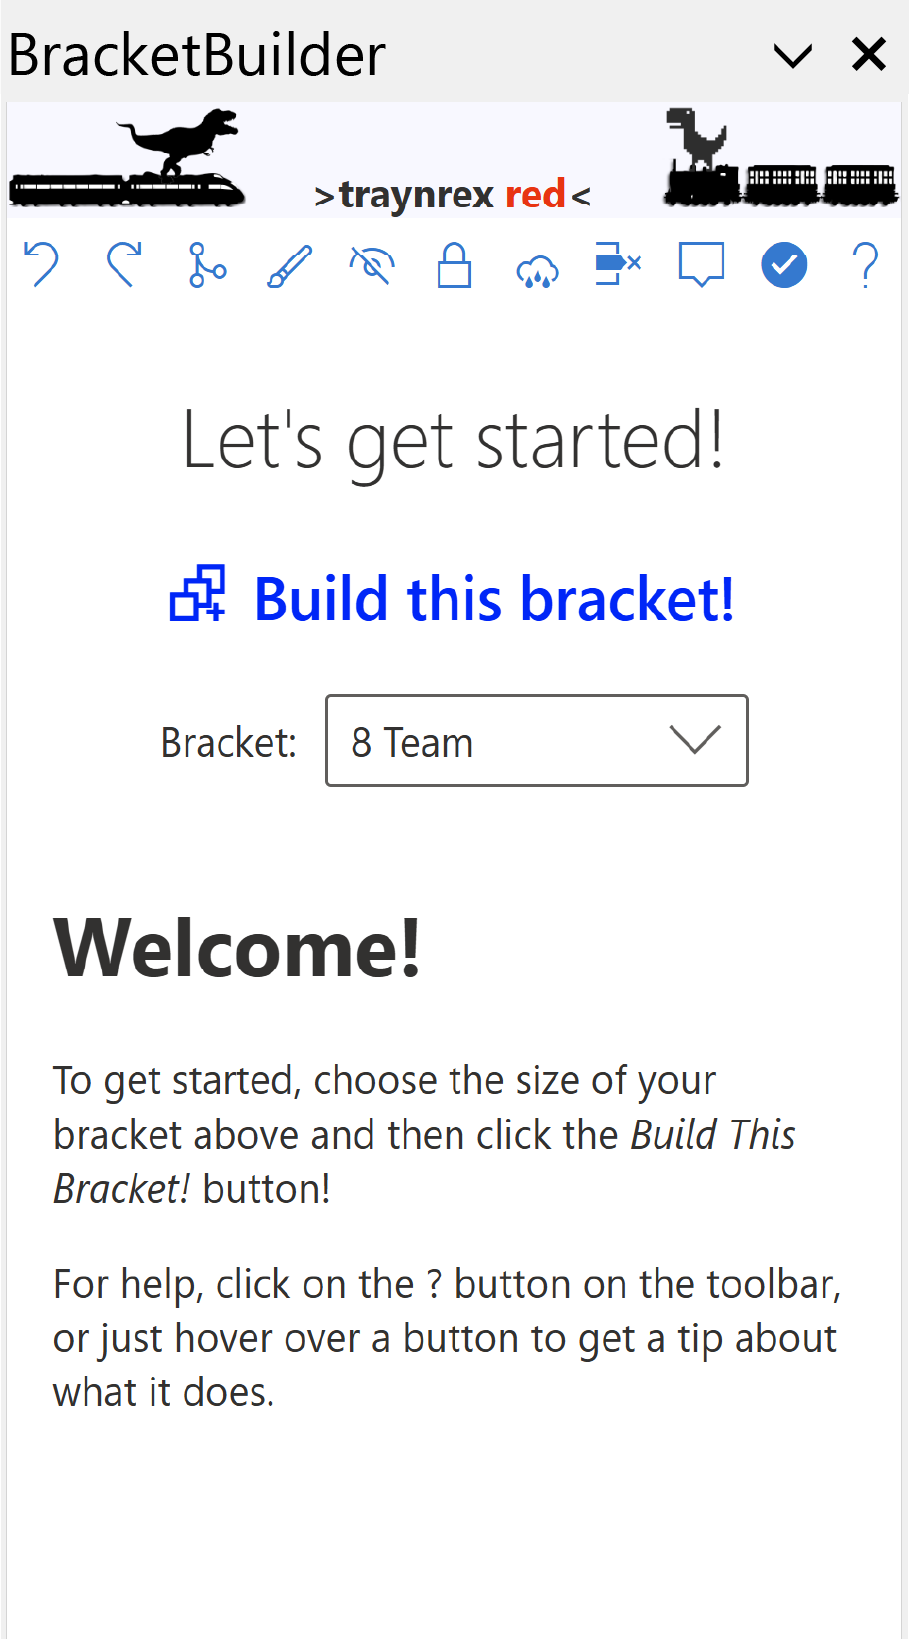
  • Choose "9 Team" and click Build a bracket to setup your workbook.
  • Select D6 and type "6/25/22" - this is the start of our tournament (notice that all the dates changed for the rest of the tournament)
  • Select cell D7 (because we want to insert on Saturday 6/25)
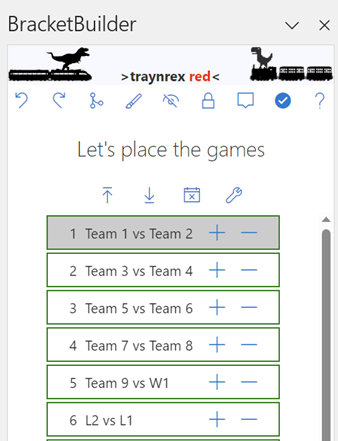
  • Insert game 1 (Click "+" for game 1 )
  • Insert game 2
  • Insert game 3
  • Insert game 4
  • Select cell G7 (so we insert games on 6/26 now)
  • Insert game 5 (notice that the grid adjusted to make space for the game)
  • Insert game 6 (since G1 and G2 played on Saturday)
  • Insert game 9

At this point, we can't fit any more games on Sunday because G7 requires G5, G8 requires G6, and G10 requires G5. Since G5 and G6 play on Sunday, we can't play G7, G8, or G10 until Monday.

  • Select J7 (for Monday)
  • Insert game 7
  • Insert game 8
  • Insert game 10
Ok, that looks a little funky. Maybe we could do better.
  • Click Undo three times. Games 10, 8, and 7 should be gone now.
  • (Make sure J7 is still selected)
  • Insert game 8
  • Insert game 7
  • Insert game 10
Ok, that looks better... All we did was change the order we inserted the games and BracketBuilder was able to make a better guess about the position.
  • Select M7 (for Tuesday)
  • Insert game 11
  • Insert game 12
  • Select P7
  • Insert game 13
  • Insert game 14
  • Select S7
  • Insert game 15
  • Select V7
  • Insert game 16
  • Select Y7
  • Insert game 17
  • Select AB7
  • Insert champion (game 18)

At this point, the bracket is done. Now let's go back and fix the team names. Go to the TeamsAndFields sheet. Fill out the team names for the bracket (fill in cells B23 to B31with team names).

Now back on the Games sheet, you can click on each "Field #1" or "6:00 PM" and put the correct field and time. (You could also do this on the TeamsAndFields sheet).

Lastly, let's fill in some tournament information. Go to the "TournamentInfo" sheet:

  • Select B1, enter "9 Team Tournament"
  • Select B2, enter "Sample Walkthrough"
  • Select B3, enter "Al Houghton Stadium"
  • Select B4, enter "Little League Dr, San Bernardino, CA
  • Select B5, enter "Little League"

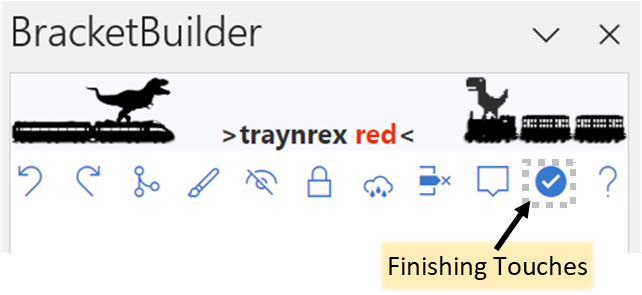
And the final step is to apply the finishing touches to the bracket:

  • Click on the Finishing Touches
  • ( ) button.

And there you go... A completed bracket, formatted and ready for printing.
Detailed Instructions

In this detailed start section, we will build the same bracket that we built in the QuickStart, but we will go a little further in depth as we build it, along with links to more information.

The first thing you have to do is build the bracket workbook. BracketBuilder comes with lots of built-in double elimination brackets for various team sizes. You can choose the size of the bracket using the bracket chooser. You can also create custom brackets, which is covered in CustomBrackets.

For this example, select a 9 Team bracket by choosing 9 Teams in the Bracket Chooser.

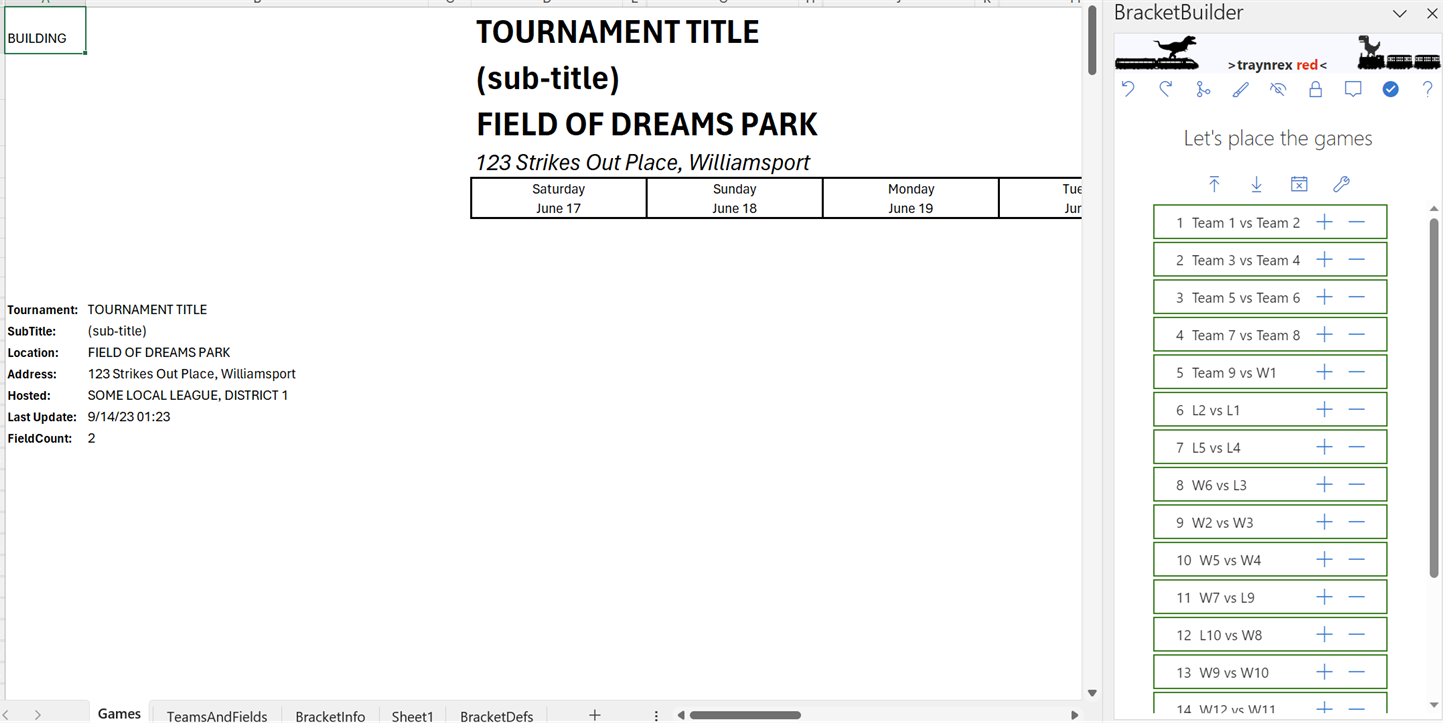
Once you click "Build a bracket", your workbook will be setup to start building out your bracket. You will see that a bunch of new sheets were added to your workbook. You can read the details about all of these sheets on the Editing the Sheet help pages.

Starting the Bracket Grid and taskpane screen clipping

The Games Sheet is where we will spend most of our time when building a tournament bracket. This sheet has the tournament information as well as the bracket itself. This is also where you will be building the actual bracket.

If you want more information on all of the items on the Games Sheet, go here

For now, we're going to jump in and get started.

Bracket Dates

The days of the tournament are Self Healing -- that means that if you change on of the dates for the tournament, then all the later dates will automatically update. We will take advantage of this to set the first day of our tournament. Just click on the first date (cell D6) and just enter whatever you want to be the first day of the tournament. For our example, enter 6/25/22 in cell D6.

Once you update the first date, all of the other dates should automatically change. If you had entered a date that wasn't a Saturday, then the days of the week would have also changed.

Adding Games to the bracket

Now lets add some games to our bracket.

Adding the first game

BracketBuilder tries to make adding games as easy as possible, but that can be pretty hard sometimes. It tries to do what you want when you insert a game, but sometimes you might want it to do something automatically, and sometimes you want it do just do exactly what you told it to do.

Select cell A1 (if its not already selected), and then click the Add Game button ( ) to insert the game. Since this is the very first game being added to the bracket, your selection will automatically be moved to Column D.

Notice that the game was given a start time of 9am and it was put on Field #1. The time and field were automatically guessed. Take a look at Guessing Field Times for more information.

Grid and taskpane screen clipping
Bracket changes after a game is inserted Grid and taskpane screen clipping

Now that you have a game inserted, let's take a moment and see what has changed.

The most obvious change after inserting a game is that a game is now on the grid. To learn more about the structure of games on the grid, check out Bracket Game Structure

Another thing that has changed is the BracketBuidler taskpane on the right side. The game you just inserted is now shaded gray. Games without gray shading are still waiting to be placed on the bracket while games shaded gray are already on the bracket.

Note that the Add Game button still works even if the game is already added to the bracket. If you click Add Game for an already inserted game, then the game will first be removed from the bracket, and then inserted.

The TeamsAndFields sheet has also been updated with the time and field for the game you just inserted.

Adding more games

Our bracket can play 3 more games on Saturday -- the first 8 teams can play on Saturday, and the 9th team (which hsa a bye) will play on Sunday.

Go ahead and Click the + (Add Game) button for Game 2. This will insert Game 2 in the next available location on the bracket on Saturday. Notice that since we have 2 fields for this tournament, this game also plays at 9:00am on Saturday, but on Field #2

Now Click the + button for Game 3. With only 2 fields, we can't play this game at 9:00am on Saturday (we are out of fields), so we now move the the 12:00pm slot and start over with Field #1. Lastly, Add Game 4.

At this point we have placed all the games on Saturday that can be played. Go ahead and try to add game 5 by Clicking on the + for Game 5. BracketBuilder will notice that you can't place Game 5 in the same column as Game 1 -- Game 5 needs to connect with the winner from Game 1 (W1).

Grid and taskpane screen clipping

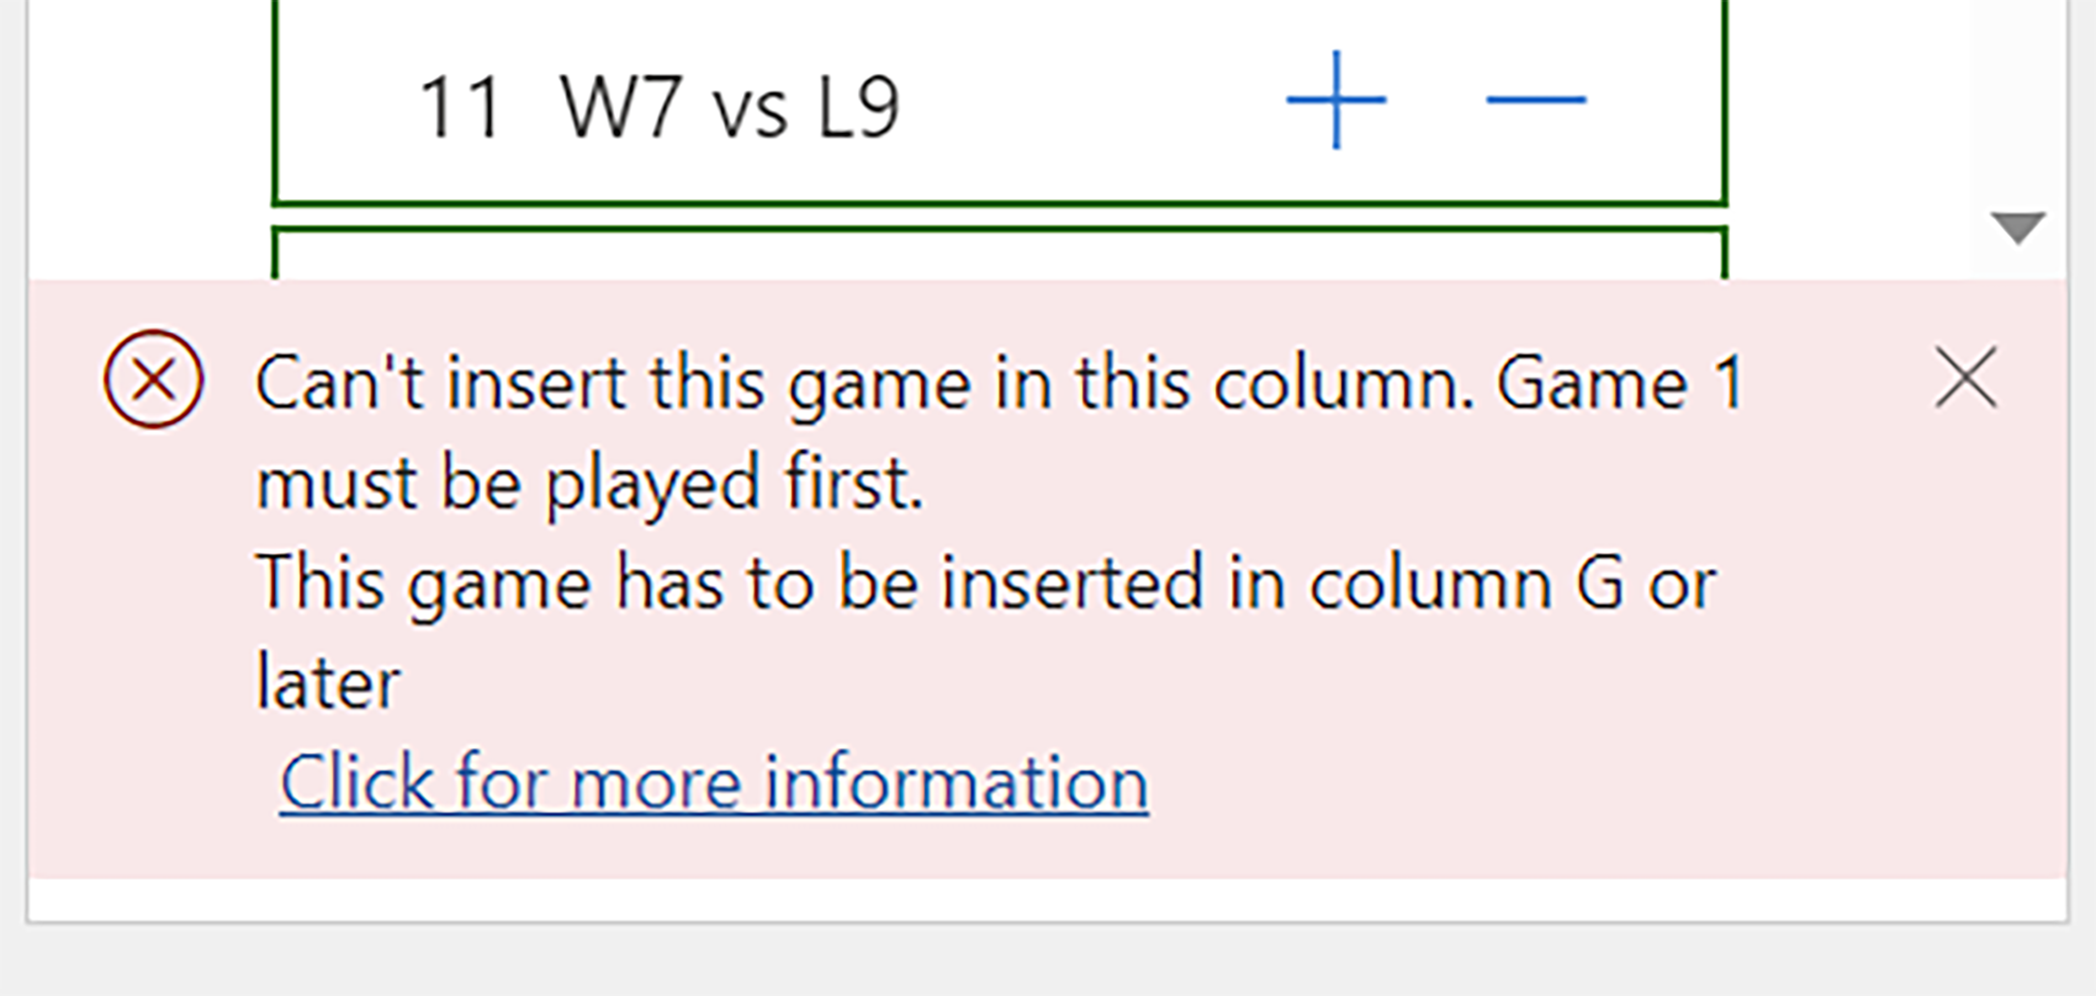
When you try to place this game you will get an error message telling you why the game couldn't be placed, and in this case it will suggest where you need to place the game.

Select the next day

Now we want to play the next set of games on Sunday. To do this, Click on Cell G1. Clicking in Column G tells BracketBuilder that you now want to insert games in this column, which is Sunday.

Insert Game 5 into the bracket. Notice how the bracket was adjusted so Game 5 would fit at the top of the Sunday Column? All of the games on Saturday shifted down a little bit to make room for Game 5.

Now let's Add Games 5, 6, and 9 to the bracket. We can't add Games 7 or 8 because they require Games 5 and 6 to be played first. Notice that when you added game 6, it put it at the bottom of the Sunday column, and when you added game 9, it automatically placed it connecting to Games 2 and 3.

Now Click on Cell J1 in order to start adding games to Monday. Add Games 7 and 8. Notice how Game 8 need to be connected to Game 6. In order to make that happen without overlapping other games, BracketBuilder rearranged the bracket by swapping some games around, which made it possible to insert Game 8 at the bottom of Monday, and connect it to Game 6.

Add Game 10. Notice that Game 10 is played at 9:00pm on Field #1. This is probably not a great time, but you can adjust it later. Also notice that in order to connect Game 4 and Game 5 to Game 10, the grid had to be rearranged again to make things work.

Now let's take a look at our grid. The bottom of the bracket looks a little weird. Game 7 is sort of on its own. We can do better. This is a good time to take advantage of the undo feature and try things again. Click on the Undo button 3 times . This will undo the last 3 actions we took (which were inserting Games 10, 8 and 7). Notice how all the bracket rearranging was undone as well.

Now let's see if we can make things a little better. Many times, you can get a better outcome just by changing the order you insert the games. Let's try that out.

Make sure J1 is still selected and Add Game 8 instead of Game 7. This let's Game 6 easily connect with Game 8 without having to worry about moving Game 7 around. Now Add Game 7. This puts Game 7 at the bottom of the column. Lastly Add Game 10. Now our bracket looks a little nicer.

Adding the rest of the games

Now we are going to finish adding all the games to the bracket.

Click on M1 and then Add Games 11 and 12. Next Click on P1 and then Add Games 13 and 14. This will finish off the days where we can play two games in a day. Now we will be down to one game a day.

We are just going to click on the next day and add the next game for each game until we are done with the tournament. Click on S1, add Game 15 then Click on V1, add Game 16. Now we are down to the final what-if game. This game will only need to be played if team from the Winners bracket loses the game. Otherwise, it won't need to be played.

Click on Y1 and then Add Game 17. Notice that this game has extra text at the top of it indicating If first loss.

Lastly, we want to place our Champion Game. This isn't really a game, but we want to have the winner of the tournament designated, so we have one final game we call the Champion game. Click on cell AB1 and add Champion. This will automatically format the champion at the end of the tournament.

Finishing the bracket

Now that we have added all the games, there are some final things we want to do in this walk-through.

Changing the team names Grid and taskpane screen clipping

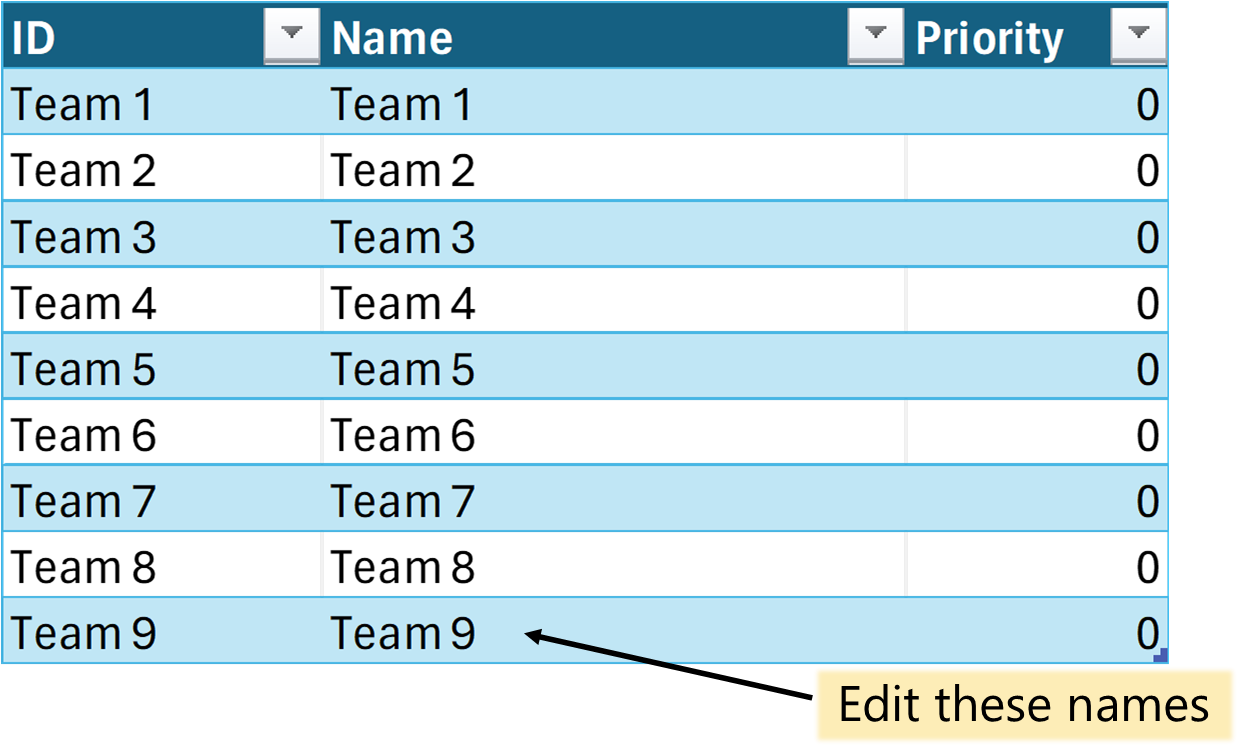
All the teams still have their default names (Team 1, Team 2, and so on). Presumably you have the names of the 9 teams involved in the tournament. You probably also did a blind draw to get an order for the teams, which means you have an order for the teams, 1 to 9.

Click on the TeamsAndFields sheet so you can edit the team names. You will see a table at the bottom of the sheet. This table has a list of the team ids ("team 1, team 2, etc") and their names. Change the team names to match your team names. Make sure to put them in according to the order of the draw. This will ensure the correct teams get any bye games, and the correct matchups happen according to the official bracket.

Changing the tournament information

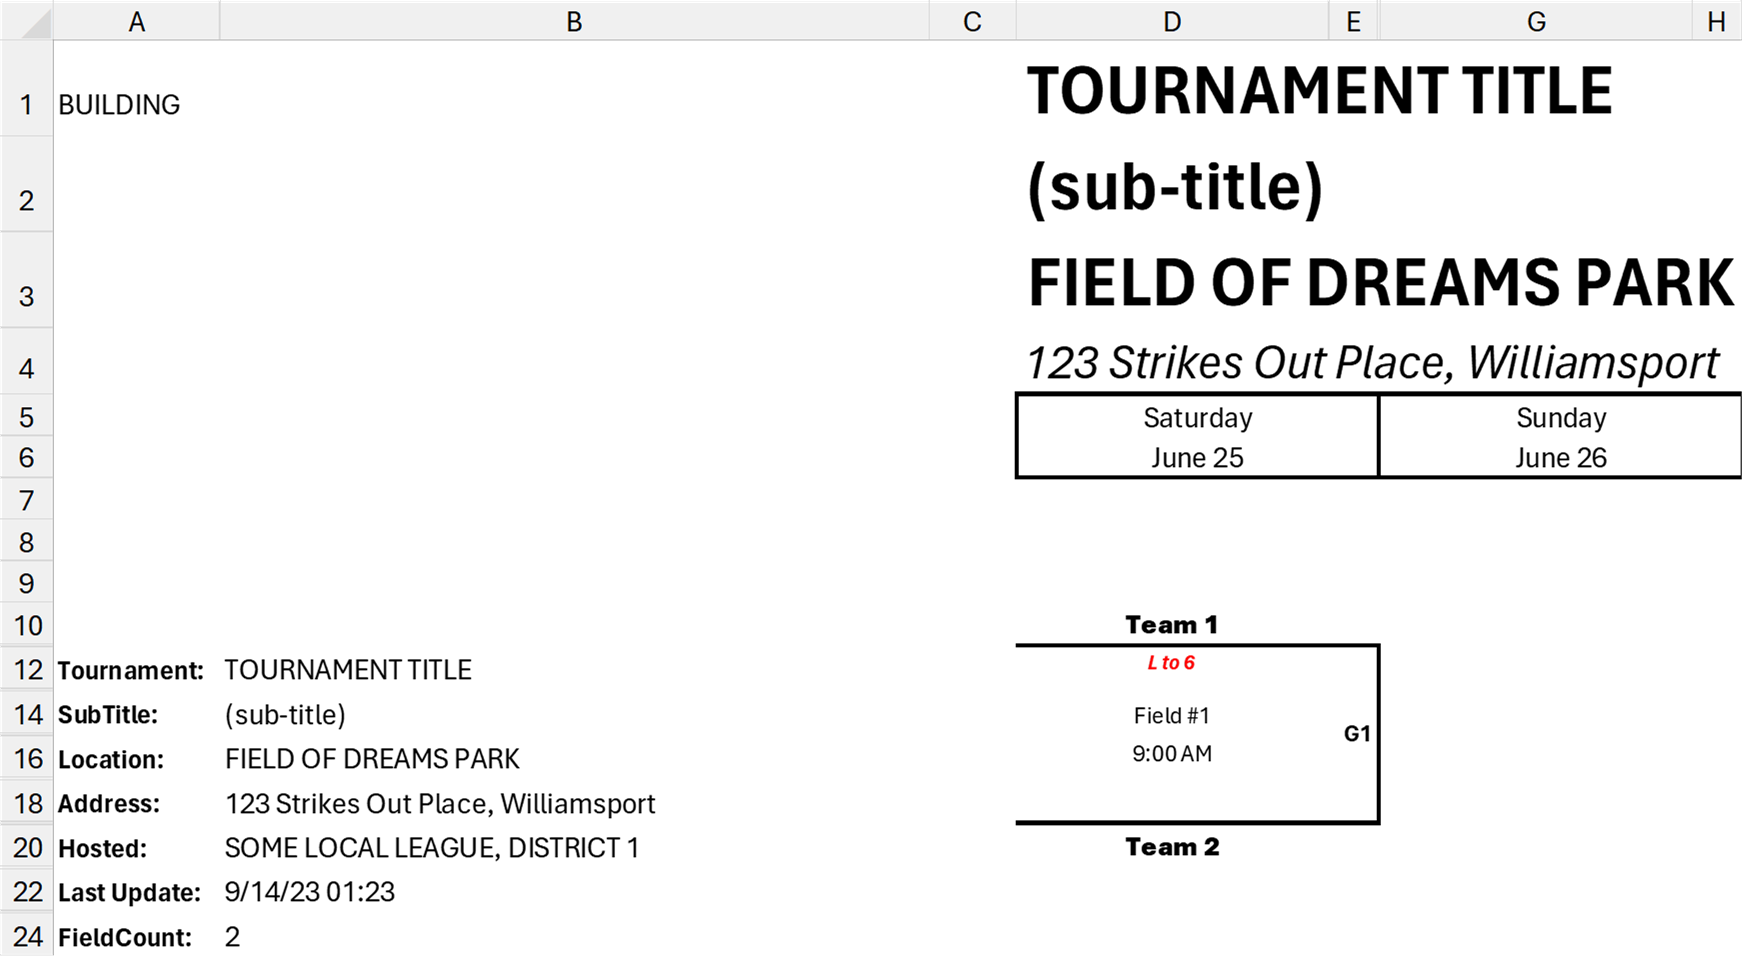
Now let's change the inforamtion about the tournament so our bracket has the right information at the top of it.

Click on the Games sheet so we can get back to the bracket. On the left side, notice that there is information like the title for the tournament, subtitle, etc.

Click on Cell B12 to edit the Tournament Title. Change the title to "9 Team Tournament". Let's continue and edit the remaining information. Click on Cell B14 and change the Sub-Title to "Sample Walkthrough". Click on Cell B15, enter "Al Houghton Stadium". Click on Cell B17, enter "Little League Dr, San Bernardino, CA".. Lastly, Click on Cell B19, enter "LITTLE LEAGUE".

As you edited each of these cells, the actual tournament information at the top of the bracket should have updated to match what you typed in.

Finishing Touches

At this point, the bracket is done but it still doesn't look great. Printing the bracket would not look good at all. Go ahead, Go to Print Preview, and notice how really bad it looks. There are a number of formatting changes that have to happen to make the bracket look good.

Click on the Finishing Touches button ( ). This will format the print area, merge all the title cells, add the hosting information, and a couple other final adjustments.

Now go back to Print Preview and notice how much better the bracket looks, fitting on one page and ready to print or convert to PDF for sharing.